 |
|
 03-17-2022, 08:06 PM
|
#1
|
|
Established Member
Join Date: Aug 2021
Location: Eastern Oregon
Posts: 38
M.O.C. #29366
|
Cable slide pulled from wall
We have a 2020 HC 330RL and while putting the dining room slide out I heard a pop. I stopped to inspect and found the cable mechanism on the back of the slide pulled away from the wall. I have a call into our service tech but while waiting for a return call I thought I would check with all of you to see if you have ideas as to what happened.
Ive searched the forums and can find where welds have broken in the wall causing slide problems but Im not sure if thats what our problem is. Has anyone else experienced this?
Also, as a side note, can anyone please help me figure out why some pictures post correctly and others rotate? Thanks in advance.
|

|

|
|
03-17-2022, 10:28 PM
|
#2
|
|
Site Team
Join Date: Oct 2005
Location: Carmichael - CA
Posts: 7,359
M.O.C. #4831
|
I can't help specifically with the cable but there have been previous reports of this problem. A Search should help you find them wile waiting for others to answer.
As for the pictures rotating, read this posting
https://www.montanaowners.com/forums...ad.php?t=83314
__________________
Carl (n Susan)
There is more to life than fuel mileage.
2012 Montana 3700RL Big Sky Package towed by a 2015 Ford F350 6.7L PSD 4WD CC LWB

|
|
|
|
|
03-17-2022, 10:47 PM
|
#3
|
|
Established Member
Join Date: Aug 2021
Location: Eastern Oregon
Posts: 38
M.O.C. #29366
|
It sounds like anchoring an aluminum plate to the wall then remounting the cable pulley has resolved the issue for another owner. Id still like to know the cause of it. I dont see any fraying of the cables or wear as if its dragging or out of alignment. Well spend more time tomorrow looking into it.
And thank you for the link to address how to get my pictures to be oriented correctly.
|
|
|
|
|
03-18-2022, 06:10 AM
|
#4
|
|
Montana Master
Join Date: Oct 2018
Location: Anderson
Posts: 2,581
M.O.C. #22835
|
Don't know how to respond about the pully yanked from the wall, other than it looks like it wasn't anchored correctly. I've got no clue how that would be fixed.
But, about photo posting. The link above explains how to post using this forum site. I use https://imgur.com/ as my photo hosting site. Create a user id and password and then you simply drag the photos from your computer to the site and they upload.
Before doing that, most forum sites have a size limitation on photos. So what I do, when I have a photo I want to post on a forum, I'll open the photo on my computer using the right mouse click and "Open With". Instead of letting the computer default to the photo application, select "Paint". Open with Paint. (Microsoft's original very simple photo editing program that comes with every Windows install.)
The next thing I do is resize the photo to 640 x 480 pixels or smaller. If the photo is in "portrait" position, I also rotate it 90 degrees and put it in "landscape". Then save the edited photo under a new name so I retain the original photo as is and make sure it's saved as a .jpeg image somewhere on my computer.
I can now drag the new edited photo into imgur.com. Once on imgur.com I open the image, and do a right click on the image to bring up the image URL. I copy that URL and then paste it with the link on the forum.
I know this sounds like a lot of steps, and I guess it is, but the entire process takes less than a minute once you done it a time or two.
imgur.com is absolutely free too. No gimmicks, absolutely free. I do get an occasional add from that site offering to use their paid subscription which give you more storage.
If you have noticed, on public available web sites, forums, chat room, everything, if you attempt to post a photo taken in "portrait" position, the web site will almost always turn it sideways to make it "landscape", and the end result is, your photo is turned sideways.
So, in order to simplify things from the very beginning, avoid taking photos in the "portrait" position of your camera or phone. Always take them in landscape if you plan to upload them to an internet site somewhere.
When taking odd angle photos from a cell phone, the phone image will probably rotate automatically, which can cause an unwanted "portrait" photo. When that happens, for example taking a photo straight down, go to your phone setting, and click off the "auto rotate" feature on your phone. Then the image will always stay in landscape, no matter what angle the phone is in. Once the photo is taken, switch back on the "auto rotate" feature.
If you do it this way, this web site will recognize both landscape and portrait images.
Landscape.... yesterday's breakfast:

Portrait, same image:

__________________
Who you are right now is a sum total off all you use to be.
2019 Montana High Country 375FL
2014 Chevy Silverado Duramax, 6.6L Dually

|
|
|
|
|
03-18-2022, 01:56 PM
|
#5
|
|
Established Member
Join Date: Aug 2021
Location: Eastern Oregon
Posts: 38
M.O.C. #29366
|
Got it fixed
In case someone finds themselves in our position, in need of moving the rv and cant get the sides back in due to the cable pulley tearing away from the wall I thought Id post our solution. After sending pictures to the dealer for repair we were told this unfortunately is rather common. They said the fix is a steel plate attached to the wall with larger screws and then the pulley remounted. Since we were supposed to be on the road today we decided to do the repairs ourselves. Using a jack we supported the slide in that corner then loosened the cables enough to work with the pulley. The service tech said its important before loosening the cables to measure the ends to the adjustment nut so after reattachment we would have them back at the correct tension. After losing the cables we cut a steel plate and mounted it to the wall at the studs then attached the cables pulley and tightened the cables back. We ran the slide in and out several times and it seems to have worked. The service tech is ordering plates for the other pulleys and well be adding those as a precaution. It took about 2hrs to do this repair and we dont want to have it ruin anymore trips if another one comes out.
And thank you for the advice on posting pictures. I took this one in landscape so hopefully it posts correctly.
Also, Dutchman, your breakfast looks great! I notice in the background you have a carpet runner on your steps. If you dont mind my asking, how did you attach it?
|
|
|
|
|
12-07-2022, 07:17 AM
|
#6
|
|
New Member
Join Date: Oct 2022
Location: Simcoe
Posts: 6
M.O.C. #31823
|
Quote:
Originally Posted by NWCampers

In case someone finds themselves in our position, in need of moving the rv and cant get the sides back in due to the cable pulley tearing away from the wall I thought Id post our solution. After sending pictures to the dealer for repair we were told this unfortunately is rather common. They said the fix is a steel plate attached to the wall with larger screws and then the pulley remounted. Since we were supposed to be on the road today we decided to do the repairs ourselves. Using a jack we supported the slide in that corner then loosened the cables enough to work with the pulley. The service tech said its important before loosening the cables to measure the ends to the adjustment nut so after reattachment we would have them back at the correct tension. After losing the cables we cut a steel plate and mounted it to the wall at the studs then attached the cables pulley and tightened the cables back. We ran the slide in and out several times and it seems to have worked. The service tech is ordering plates for the other pulleys and well be adding those as a precaution. It took about 2hrs to do this repair and we dont want to have it ruin anymore trips if another one comes out.
And thank you for the advice on posting pictures. I took this one in landscape so hopefully it posts correctly.
Also, Dutchman, your breakfast looks great! I notice in the background you have a carpet runner on your steps. If you dont mind my asking, how did you attach it?
|
Thanks for the information on the pulley cable system repair. Just have a couple of questions before I start. Did you use self tapping metal screws for your repair and if so what size and how long? Also, were you able to get some screws into the metal frame?
what is the material in the wall and how thick is it. I'm going to use wood screws here. Is it OSB or plywood and I thinking it's 1/2" thick? I just don't want to have screws too long
Thank you Jim
|
|
|
|
|
12-07-2022, 07:18 PM
|
#7
|
|
Established Member
Join Date: Aug 2021
Location: Eastern Oregon
Posts: 38
M.O.C. #29366
|
Sorry for the delay in response. I've been trying to figure out how to get it to attach an image for you and I'm struggling.
The steel plate was one I had on hand that measures 1/8" thick. I cut it into an L shape to fit around the slide out opening. The top measures 10 1/4" wide, the right side is 8" long. The left side is 5" and the bottom leg is 3". I pre-drilled the steel plate trying to locate the screws in similar areas as they were originally in hopes of hitting the studs that support the slide. It's an aluminum header across the top of the slide opening so that's the support. The screws were also what I had on hand. They are #12 self tapping roofing screws that are 1 1/4" long.
We were in a hurry trying to make a reservation we had when this happened so it was a quick fix using what I had on hand to get on the road. In hind sight I could've cut that leg on the right side down to about 2" instead of the 3" because when the slide is out you can see a small piece of the steel. My intention was to paint it to hide better but that didn't happen in the time we had before we needed to leave.
__________________
Shawn & Lindsey
2020 MHC 330RL | 2015 Chevy Duramax 2500
|
|
|
|
|
12-08-2022, 09:06 AM
|
#8
|
|
New Member
Join Date: Oct 2022
Location: Simcoe
Posts: 6
M.O.C. #31823
|
Quote:
Originally Posted by NWCampers
Sorry for the delay in response. I've been trying to figure out how to get it to attach an image for you and I'm struggling.
The steel plate was one I had on hand that measures 1/8" thick. I cut it into an L shape to fit around the slide out opening. The top measures 10 1/4" wide, the right side is 8" long. The left side is 5" and the bottom leg is 3". I pre-drilled the steel plate trying to locate the screws in similar areas as they were originally in hopes of hitting the studs that support the slide. It's an aluminum header across the top of the slide opening so that's the support. The screws were also what I had on hand. They are #12 self tapping roofing screws that are 1 1/4" long.
We were in a hurry trying to make a reservation we had when this happened so it was a quick fix using what I had on hand to get on the road. In hind sight I could've cut that leg on the right side down to about 2" instead of the 3" because when the slide is out you can see a small piece of the steel. My intention was to paint it to hide better but that didn't happen in the time we had before we needed to leave.
|
Thanks Shawn, I have assembled the parts and tools I need. My slider is closed, the pulley is holding on for now.
I am going to do this repair when I get to Florida after Christmas. I appreciate you taking the time to help me.
Merry Christmas and all the best in the New Year.
|
|
|
|
|
07-29-2023, 02:30 PM
|
#9
|
|
New Member
Join Date: Jul 2023
Location: Melbourne
Posts: 1
M.O.C. #33091
|
How did you mount the steel bracket? Did you just put the bolt through the wall anywhere or were there specific spots you had to put them? Also did you just mount the pulley system to the steel bracket or through the wall too? I just had the same thing happen to mine.
|
|
|
|
|
07-29-2023, 05:15 PM
|
#10
|
|
Montana Master
Join Date: Jun 2017
Location: POINTBLANK
Posts: 1,887
M.O.C. #19944
|
Quote:
Originally Posted by Ironchungis
How did you mount the steel bracket? Did you just put the bolt through the wall anywhere or were there specific spots you had to put them? Also did you just mount the pulley system to the steel bracket or through the wall too? I just had the same thing happen to mine.
|
As JIM65 mentioned, Remove the existing bracket, removed that 1/8" of fiberwood board over the frame. Drill out existing holes for the steel bracket and install the rivnuts. Then reinstall the bracket making sure the bracket is touching the rivnuts. Might plan on putting a washer between the steel bracket and the rivnut. tighten the bolts but not over tighten.
__________________
 RAM 22' DRW 3500 Crew LB 40 gal reserve tank / RETRAX Bed Cover / 2020 373RD HC / IS / MOPEKA Tank Monitor / Furrion Side&Rear Cameras RAM 22' DRW 3500 Crew LB 40 gal reserve tank / RETRAX Bed Cover / 2020 373RD HC / IS / MOPEKA Tank Monitor / Furrion Side&Rear Cameras
Slide Toppers / EMS-HW50C / Sailun 85's
3rd AC / Dometic 320
|
|
|
|
|
07-29-2023, 08:03 PM
|
#11
|
|
Established Member
Join Date: Aug 2021
Location: Eastern Oregon
Posts: 38
M.O.C. #29366
|
Quote:
Originally Posted by Ironchungis
How did you mount the steel bracket? Did you just put the bolt through the wall anywhere or were there specific spots you had to put them? Also did you just mount the pulley system to the steel bracket or through the wall too? I just had the same thing happen to mine.
|
Jim65 did it differently than we did so Im not sure which way of fixing it youre referencing but if youre referencing the original fix of attaching the steel plate I predrilled the holes into the plate offset of the original holes that ripped out of the wall and made certain I was screwing it into the aluminum frame that is around the slide out. Then I attached the pulley to the steel plate going through the steel plate and also into the aluminum frame behind the plate. The strength comes from the oversize of the plate being anchored into a larger area of the frame. It has held strong without issue since the repair.
__________________
Shawn & Lindsey
2020 MHC 330RL | 2015 Chevy Duramax 2500
|
|
|
|
|
03-18-2022, 03:17 PM
|
#12
|
|
Montana Master
Join Date: Feb 2008
Location: woodstock
Posts: 542
M.O.C. #8174
|
Wow sorry about that I have heard about the cable issues, if you can get Montana’s customer service to help would be the first thing but the Affinity rv group in goshen would be a great place to ask they have a lot of experience with all the Montana’s.
__________________
Ed
Montana Master
Woodstock Ga
2020 3931 FB Legacy
|
|
|
|
|
03-18-2022, 08:12 PM
|
#13
|
|
Montana Master
Join Date: Jun 2018
Location: Carson City
Posts: 2,017
M.O.C. #21963
|
Good job on that fix. Looks like it should go the distance.
__________________
2016 3160, Legacy, Sailuns, Splendide 2100 xc vented, 1 1/2" axle lift blocks, disk brakes. 2014 Ram 3500 SRW SWB 4X4 6.7 Aisin Mega Cab, EBC slotted disks and brakes, Titan fuel tank.
|
|
|
|
|
03-19-2022, 09:46 AM
|
#14
|
|
Montana Master
Join Date: Apr 2006
Location: Mesa az
Posts: 2,945
M.O.C. #5651
|
Curious here. I don't quite understand the picture and pulleys. It looks like the pulleys and cable run sideways across the slide instead of perpendicular to the wall. Is it just the way the picture came out or what?
__________________

Tom and Gail
2013 Mountaineer 362
2012 Silverado 2500
|
|
|
|
|
03-19-2022, 11:20 AM
|
#15
|
|
Montana Master
Join Date: Oct 2018
Location: Anderson
Posts: 2,581
M.O.C. #22835
|
twindman, the pullies are correct. The motor is in the center of the slide on the top. Each side of the slide has 4 cables. Two on each side (top and bottom) for pulling the slide in - those are the cables on the outside of the slide, two on each side (top and bottom) for pulling the slide out - those are the cables on the inside of the slide. The cables run parallel (side to side) along the top of the slide as the motor is in the center of the slide on top. They run perpendicular (up and down) on the sides of the slide.
NWCampers,
That is a fantastic fix. I've never seen anything like that before. I've had a few of my cables break over the last 3 years, but never any problems with the pullies. Thanks for sharing, this is definitely something to keep a close watch on.
Also, the carpet on the steps. That is a rug-mat I picked up form a home improvement store. It's got a rubber back and a fiber top. You'd use these, maybe in a garage. We original bought 2 of them so they fit under our kitchen table in the house. They worked great for our original purpose, until we picked up a larger kitchen table. So they got put away.
Move forward in time and we got two new wiener dog puppies and those steps with the open back and slick aluminum surface scared them and neither would go up or down. The goal was to put something on the steps that was not slick and something that would cover the open gaps behind the steps. That's when I remembered those 2 mats.
The length was almost perfect, but if I cut them in half long way, the width was just perfect to fit the width of the steps.
I laid the mat on the steps and shaped them (the way they look in the photo above) and I had only about 6 inches of length that was not needed. I didn't cut that off, I realized I could just tuck it under the bottom step.
Fastening it to the steps was really pretty simple. It took two different attempts, but I finally found the longest zip ties I could find. At the top of each step, I punched a hole through the mat, put the zip tie through the hole, over the top of the step and through another punched hole under the step. Pull the zip tie nice and tight on both sides, and repeated the next step down. The tail of the zip tie is under the step and then trimmed.
At the bottom, I tucked the extra length under the step and the zip tie holds it up and out of the way. We've had these on the steps for over 2 years now. The only problem with them is, it does add weight to the steps and to close the steps, they are a little heavier now. And when it rains, they get wet. I don't remove them, they usually dry pretty fast and drain very well being rubber on the bottom side. The only time they dripped water on the floor on the inside of the camper in the up position was when we had a torrential rain and we needed to close up because we were traveling.
I've removed them twice and reattached after giving them a good cleaning, and once to swap out smaller zip ties hooked together, which resulted in the connection between the zip ties (that square thing), being on the top of the steps, which was really hard on bare feet. So, I keep searching for really long ones, until one day I found them.
My dogs have no problem with the steps, and when it snows, they sweep off very easy. No problems with slick steps any more.
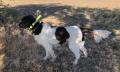
Original (I added the reflector because this the back door on the opposite side of the camper. It's an attention getter, when we stop at rest stops or on a curb and need to access the bathroom). Anything to get traffic attention.

After:

Here's what the under side looks like:

__________________
Who you are right now is a sum total off all you use to be.
2019 Montana High Country 375FL
2014 Chevy Silverado Duramax, 6.6L Dually
|
|
|
|
|
03-21-2022, 07:17 PM
|
#16
|
|
Established Member
Join Date: Aug 2021
Location: Eastern Oregon
Posts: 38
M.O.C. #29366
|
Dutchman, thanks for jumping in to explain the pulley system. We were out of service for a couple days but I’m happy to report the slide cable pulley fix is solid and we were able to make our destination. Nothing like having reservations then having something go majorly wrong at the last minute.
And thank you for the explanation and pics of your steps. I tried using a harbor freight rubber mat meant for garages only on the back of ours (we also have a dog that doesn’t like the gaps) but the way I attached it wasn’t securing well. The zip ties were ripping through the mat, but I see you’re going completely around the steps which is more secure and also having the rubber backed rug would help it to not rip through and add extra traction. This is my next project. Thank you.
__________________
Shawn & Lindsey
2020 MHC 330RL | 2015 Chevy Duramax 2500
|
|
|
|
|
03-23-2022, 02:34 PM
|
#17
|
|
Seasoned Camper
Join Date: Oct 2017
Location: South Jordan
Posts: 80
M.O.C. #20689
|
Feel lucky it was only the bracket that pulled out. Many have issues (including my HC) with the cable system breaking internal wall stud welds at base plate or ceiling header and the whole wall section has to be replaced / repaired.
I don't think most RV'ers know just how much stress the cable system places on the wall and pulleys. While the concept of using cables seems on the surface to be a much lighter weight and less costly way to move slides in and out, in reality, everything has to be perfectly aligned and assembled correctly to work reliably; the walls, cable tightness, pullies and supports have to be strong enough to handle the high stress / torque. As we all know, RV's are not exactly built to high standards and there is a lot variances in aluminum wall stud locations, welds, hardware, mounting and quality control. In a cable slide system, if any of the components, cables and supports are not within intended design tolerances, you're almost guaranteed to have a slide issue as the RV bounces down the road over many years.
It should be no surprise that Keystone has gone away from cable slides in all Montana products (including HC's) in recent years.
__________________
2018.5 Montana HC 305 RL
2019 GMC 3500 HD Denali
|
|
|
|
|
03-23-2022, 04:42 PM
|
#18
|
|
Established Member
Join Date: Aug 2021
Location: Eastern Oregon
Posts: 38
M.O.C. #29366
|
Quote:
Originally Posted by Fishin2dMax
It should be no surprise that Keystone has gone away from cable slides in all Montana products (including HC's) in recent years.
|
We werent aware they stopped using the cable system. What are they using now?
We agree with what you said about the tension on the slide and were skeptical of the cable system for that reason. Im glad it wasnt the wall weld breaking for us, pulling from the wall was bad enough. Hopefully whatever system theyve chosen to change to has less problems.
|
|
|
|
|
03-23-2022, 04:57 PM
|
#19
|
|
Site Team
Join Date: Sep 2017
Location: Oro Valley
Posts: 3,923
M.O.C. #20477
|
[QUOTE=NWCampers;1247211]We werent aware they stopped using the cable system. What are they using now?
The new HCs are starting to get hydraulic slides similar to their higher end Montana cousins.
__________________
Zack and Donna plus Millie and Ranger
2018 3160RL
"Life is too short to stay indoors, enjoy the ride!"
|
|
|
|
|
04-03-2022, 10:51 PM
|
#20
|
|
Seasoned Camper
Join Date: Feb 2022
Location: Erie
Posts: 90
M.O.C. #30432
|
Thank you for your posts re cable slides pulling out. We just (6 months ago) bought a new 2022 HC 295RL. Do you have any suggestions for weak links we need to watch out for. We're mostly DIYers; but, mostly hacks that need adult supervision even though I'm 70. Thanks for any suggestions/opinions. Apparently I can't give you my email address as I'm on some kind of probation.
Thanks again Jack Horn
|
|
|
|
|
|
 Posting Rules
|
You may not post new threads
You may not post replies
You may not post attachments
You may not edit your posts
HTML code is Off
|
|
|
|
 » Recent Threads
 |
|
|
|
|
|
|
|
|
|
|
|
|
|
|
|
|
|
|
|
|
|
|
|
|
|
|
|
|
|
|
|
|
|


 Hybrid Mode
